Grab dinner by the balls

Hello everyone!

For this weeks recipe we attempted the mozzarella stuffed meatballs found on Tasty. Never have I ever made meatballs in my life. The only meatballs I ever made were the frozen ones from Subway. That was my first job ever. I remember the first time I ever had to make them. It was lunch time, and nobody had prepped them the night before. I had to improvise, although they came out a bit watery, I received an “E” for effort.

When it comes to cooking, I don’t know why I am so impatient. When we decided on this, I was dreading it because the meatballs take 2-2.5 hours to  cook. For the longest time, I wanted a crock-pot. Every birthday, Christmas, you name it; I always mentioned it or dropped hints. Last year my wish was finally granted. It made me realize, I don’t like waiting so long for my food to cook. Don’t get me wrong, I love my crock-pot, but I only use it when I know I won’t be home hovering over it while my food is cooking.

After viewing the video from Tasty numerous times, we began.
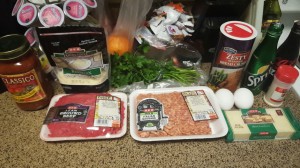
ingredients

Ingredients: -2 bottles of your choice of spaghetti sauce -1 lb of beef -1 lb mild Italian sausage -Breadcrumbs -2 eggs -garlic powder -low moisture mozzarella -salt -pepper -basil

We started by cutting the cheese into small cubes. After doing so, Buzzfeed directs you to keep the cheese in the fridge while preparing the meatballs.

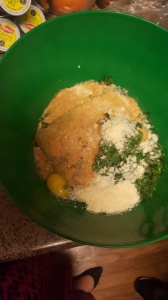
The meatballs weren’t as complicated to put together as I thought. Once we added all the ingredients together, it was time to get messy!

all together

Once we mixed the ingredients together, it was time to make some balls!

Grab just enough of the mix to get a good size ball, compare to a ping pong ball.

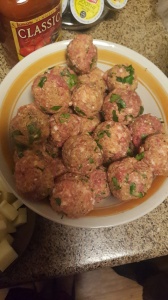
balls

Once you’ve made your balls, you can now add cheese!!

Time to get cheesy

This part was the easiest. You just insert the cheese inside the meat and roll it back to a ball.

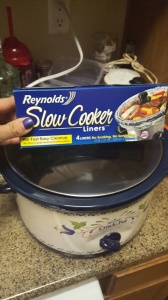
After this process it was time to put the in the crock-pot. Before we did this, we lined the crock-pot with a slow cooker liner. This is the best inventions ever. It makes the clean up process super easy. If you are a frequent crock-pot cooker, I definitely recommend you start using these.

Crockpot

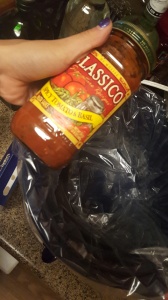
Once the crock-pot is good to go, add your sauce then meatballs. You are going to put in a few and then add more sauce. Continue this process until you are out of balls.

Sauce

I recommend not stirring the meatballs right after you put them in. I made this mistake and I damaged 3 meatballs.

Now is the time to be patient…

crockpot

2 hours later

After waiting patiently (not really), it was time to try these bad boys.

fin

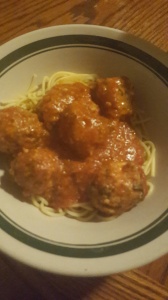
We paired the meatballs with spaghetti. You can choose whatever you want or just enjoy them by themselves.

The verdict….

expectations

vs

reality

The meatballs turned out really good. My picture may not be as perfect as Buzzfeed’s but this is one meatball even Mario Batali would be proud of 🙂

Until next time, check out our video and let me know what you think.
Stop thinking, “fork it, lets’s get take-out” and check out this post.

Hello everyone!

For today’s post I will be reviewing one of my peers blogs. The blog I chose is Eatsntreatstxst, inspired by Annie Eichler. Her blog is about cooking. It is extremely similar to mine. She picks simple recipes anyone can follow and hopes to inspire other to cook.

eatsntreatstxst

Her latest post was on Chinese food. The food prepared was fried rice. Annie makes it simple by explaining each step and provides images so you know what your food should look like.

After reading her post, it reminded me of a recipe my Zumba sister sent me from Tasty, cauliflower fried “rice”.

I laughed because when she sent it to me, I thought, “Man, nobody ever sends me healthy recipes, just the sweet and greasy ones.”

Going back to our topic, if you’re someone who is not so comfortable in the kitchen, check out Annie’s blog. She is great at explaining each step and won’t steer you wrong.

No monkeying around in this kitchen..

Hello again! Sorry I haven’t posted in a bit, this past week was crazy busy. I know that is not an excuse! For those who are new to this site, my name is Alyssa and my mission is to attempt to cook recipes posted by Buzzfeed on either Snapchat or Facebook with my lovely sidekick. Check out my other posts and see prior attempts.


This week I was having trouble picking a recipe for the blog. Buzzfeed makes it so hard to choose because they all look so good. For this recipe, I asked my followers on Facebook to help me out.

Facebook help

After many suggestions, I decided to go with the one I could not get out of my head. Chocolate cream cheese stuffed monkey bread.

What is the first thing you think of when you hear “monkey bread” ?

Monkeys and bread?

Who comes up with these things? Well whoever did, thank you for this. So for this blog I wanted to strictly stick to Buzzfeed videos, but I noticed another site posting similar recipes, Tasty. I did some research and found that Tasty is affiliated with Buzzfeed. Yay! This is their video for the monkey bread.

Let’s begin!

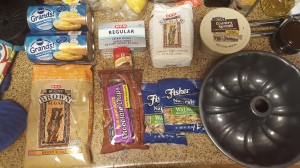
We started off with the following:

2 cans of 16oz buttermilk biscuits, 1 package of 8oz cream cheese, sugar, brown sugar, chocolate chips, butter, walnuts, cinnamon and cooking spray

2 cans of 16oz buttermilk biscuits, 1 package of 8oz cream cheese, sugar, brown sugar, chocolate chips, butter, walnuts, cinnamon and cooking spray

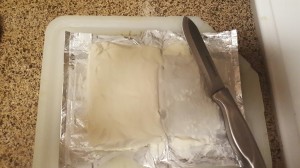
After preheating the oven to 350 degrees, we started prepping the bread. We watched the video over and over again, because we wanted to stick to the recipe as much as possible. We let the cream cheese sit out for a bit and then started cutting.

cream cheese

The recipe says to cut it into 32 pieces, but we came out with a but more. We ended up combining the smaller pieces together. After that, we started working on the balls.

In my 27 years of life, I have opened up maybe 2 cans of biscuits. I think they should come with a warning label. Whenever I see a can of biscuits, it reminds me of my old manager, Amador. He told me this story once, of a lady who was leaving the grocery store on a hot day. As the lady was walking to her car, she heard a loud POP and felt something hit her head. She assumed she had been shot and was holding her head thinking her brains were coming out. When the paramedics arrived, they asked her if she was alright and she told them she had been shot. They looked and insisted she remove her hand from her head. When she did that, she saw a biscuit stuck to her hand. Apparently, it was so hot the can of biscuits exploded and one hit her in the head.

Back to the recipe, opening the biscuits was hard. It took us multiple attempts and lots of video takes. We eventually got it.

After cutting the biscuits in half, we had to stretch them out and fill them with a square of cream cheese and chocolate chips. I didn’t notice in the video, they state they used dark chocolate. We used milk chocolate. Oops.

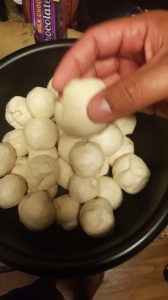
After stuffing them, it was time to get our roll on.

rolled balls

After rolling the dough, we put it in a Ziploc bag filled with 1 cup of sugar and 2 tablespoons of cinnamon. Here’s where we messed up. The recipe called for 2 teaspoons of cinnamon, so remember if you do this recipe, 2 teaspoons! Also, when placing the balls in the bag, don’t overload the bag. Try doing 4 at a time. What we noticed was the balls weren’t fully covered and we had to throw them in for another round of shaking.

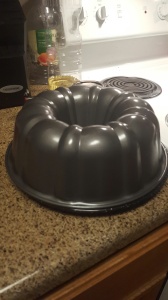
We grabbed our bundt pan, sprayed it with our good ol’ cooking spray and layered the bottom of the pan with walnuts (which are optional). From there you take the coated balls and place them in the pan. Meanwhile, you or someone else can melt the glue that keeps this beautiful creation stick together.

We grabbed 1 cup of  brown sugar and half a cup of butter.

I can’t help but think of Cloudy with a Chance of Meatballs every time I say the word butter.

Throw your 2 ingredients in a microwave safe bowl and nuke it for 70 seconds. The consistency of this should thicken as you stir it. If it seems runny, add more brown sugar.

This is your glue, from here you will pour this on top of your balls and start a new layer. Walnuts, balls and glue. Repeat until there is nothing left. If you have left over glue, just drizzle it all over.

monkey bread prepping stages

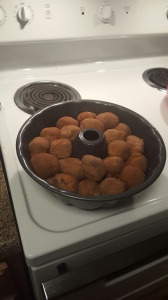
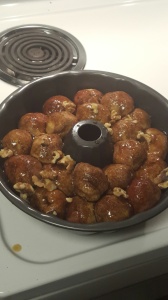
It should look similar to this:ready to bake


From here, it’s time to bake. The recipe says to bake it for 30-35 minutes. I kept checking on it and felt it was ready to come out so I may or may not have taken it out a few minutes early, but I paid the consequences later.

bundtAfter taking it out of the oven, you have to flip the pan onto a plate and let it cool for 10 minutes. This was the longest 10 minutes of my life!

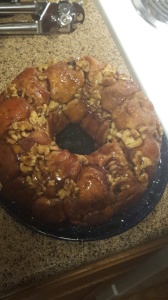
After patiently waiting (yes, I waited the whole 10 minutes) we slowly lifted the pan up. Also, be careful because it may still be a bit hot. Once the pan was lifted, we saw our creation and it was beautiful.

finalAfter waiting a few seconds, we attempted to try our masterpiece, but it was still too hot. After waiting a few more seconds, we tried again and each took a bite. It was gooey and doughy,  I should have left it in the oven the whole time. After trying several more pieces, we found some pieces that were baked all the way through.

Like I say in all my posts, it is through trial and error. When I started this I never realized how much fun it would be. Cooking in the kitchen with my boyfriend and doing what I love, eating.

I have the best of both worlds going on. Now if only I could get my son on board. Stay tuned for the next post this week, maybe I will have a different sidekick 🙂

Check out our video and experience the fun with us!

Disclaimer: No monkeys were harmed during this attempt.

Hello world!

Hello there,

My name is Alyssa Lesa and I am a junior majoring in electronic media & mass communication at Texas State University. I have an 8 year old son who I spend all my time with. After school I plan on working for either a news or radio station.

I’ve created this blog because I love to eat, but I rarely ever try new recipes. I’ll see them here and there and think to myself. “One day I’ll try that”. Well ladies and gentlemen, today is that day.

The inspiration behind this blog started with Snapchat. For those who don’t know, Snapchat is an app that allows you to view a photo or video for as long as 10 seconds before it goes away. You’re probably thinking, “What does that have to do with food?”. Well Snapchat updated it’s app and now there is a discover tab which allows you to view pictures and videos from companies such as, Buzzfeed, Food Network, iHeartradio, etc. The Buzzfeed recipe snaps caught my attention because of how easy they make it seem to be. My mission will be to pick one recipe from Buzzfeed and post a video of me trying out the new recipe.  I will do this once a week, so make sure you come and check to see if I was successful or if it was a complete failure!